Water Heater Flush Kit: What You Need
- SystemPlumbing
- Job typeExplainer
- BySam Whitlock
- UpdatedJune 2026
Heads up: this page has affiliate links. As an Amazon Associate, Vent & Valve earns from qualifying purchases at no extra cost to you. Full disclosure.
The short answer
A water heater flush kit is four things: a hot-rated drain hose, a bucket, a pair of channel locks, and 45 minutes. There is no boxed product to buy. Assemble those, follow the steps below once a year, and your tank heater runs quieter, cheaper, and years longer.
Why you are doing this
The sediment story in one paragraph.
Every gallon of water carries dissolved minerals, and heating pushes them out of solution. They settle on the tank floor as sediment, and the layer grows load after load. On a gas heater the burner now heats rock before it heats water, which is the popping and rumbling sound: steam bubbles fighting up through the sediment blanket. On electric units the lower element can bury and burn out. Either way the tank runs hotter at the steel, wastes energy, and rusts out years early. Draining the tank flushes the loose layer out the bottom before it hardens. That is the whole job.
The kit list, item by item
Four things, three of which you may own.
A hot-rated hose. The drain valve outlet is a standard 3/4-inch garden hose thread, but a standard garden hose is the classic mistake: vinyl liners soften and kink with 140-degree water. Get one rated for hot water in the right length for your route; the flush hose roundup sorts the picks by run length. A bucket. Any 5-gallon pail. You will use it to check what is coming out of the tank and to catch the dregs when you disconnect. Channel locks. A 10-inch pair opens and closes a stiff valve, steadies fittings, and persuades a crusty hose connection loose. A scrap towel and a paint pen. The towel is for the inevitable dribble. The pen is for writing the flush date on the tank so future-you has a record.
The flush, step by step
Gas and electric differ at exactly two steps.
- Kill the heat first
Gas: turn the control dial to Pilot or Vacation. Electric: switch the heater's breaker off at the panel, and treat this as non-negotiable. An electric element exposed by a draining tank burns out in seconds if the power stays on.
- Stop the cold feed
Close the cold-water shutoff valve on the inlet pipe above the heater. The tank is now isolated. If you want the water inside cooler to work with, do this an hour or two ahead and run some hot taps in the house first.
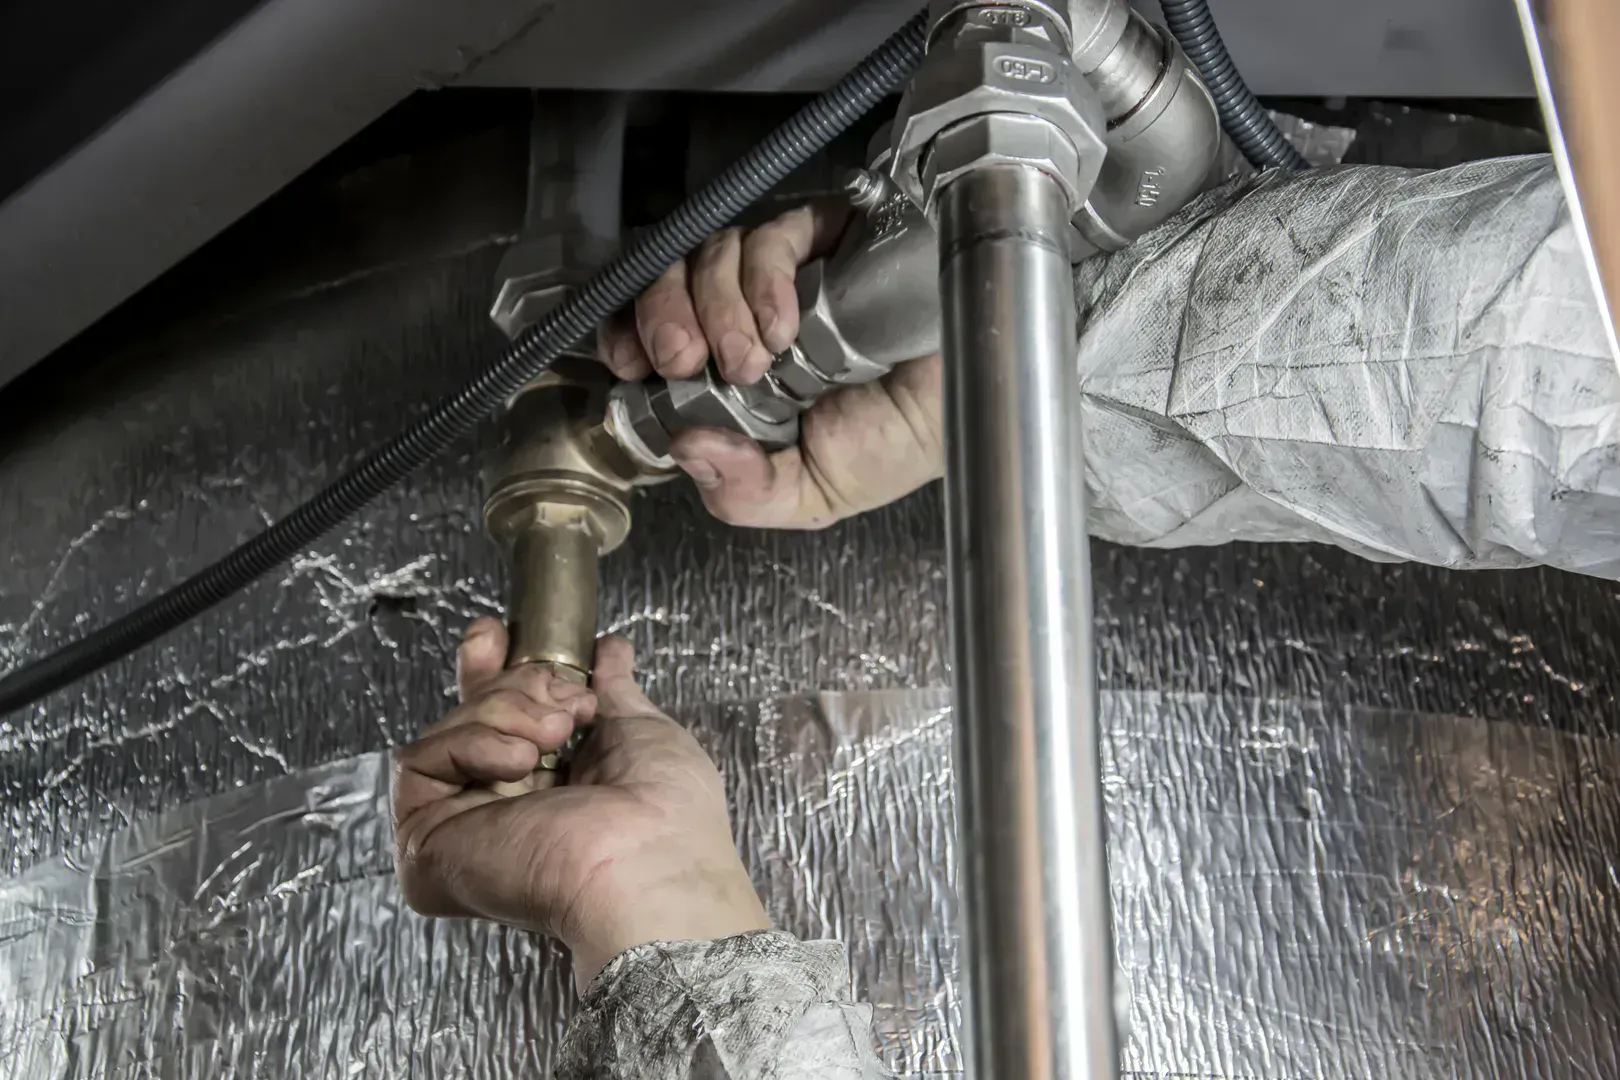
- Connect the hose
Thread the hot-rated hose onto the drain valve at the tank base, hand-tight plus a snug quarter turn with the channel locks. Run it downhill to the floor drain, bucket, or out the door. No uphill sections; gravity is the only pump on this job.
- Break the vacuum
Open a hot faucet somewhere upstairs, or lift the temperature and pressure relief valve lever, so air can enter the tank as water leaves. Skip this and the drain slows to a burble like a canned drink turned straight upside down.
- Drain and watch
Open the drain valve. Catch a bucket sample early: cloudy water with grit at the bottom is exactly what you came for. A 40 to 50 gallon tank takes 20 to 40 minutes. If flow chokes off, sediment is clogging the valve; see the rescue moves below.
- Rinse the floor
With the tank empty and the drain still open, open the cold inlet for 30 seconds and let it blast across the tank floor, then let it drain. Repeat until the bucket sample runs clear. Two or three cycles usually does it.
- Refill before heat
Close the drain valve, pull the hose, and open the cold inlet. Leave that upstairs hot faucet open until water flows full and steady with no spitting, which means the air is out. Only then relight to your normal setting, or flip the breaker back on. Heating an air pocket or a dry element is how flush day becomes repair day.
The crusty drain valve problem
The step where most first flushes go sideways.
Factory drain valves are cheap plastic with a narrow path, and on a tank that has never been flushed they misbehave two ways. Clogged: sediment jams the opening and flow dies to a dribble. Close the valve, then snap it fully open to let tank pressure blast the blockage; a few open-shut cycles usually clears it. Stubborn clogs yield to a short hose into the bucket and a straightened coat hanger worked gently through the valve. Weeping afterward: a grain of grit holds the seat open. Repeat the open-shut snap, and if it still drips, a garden hose cap with a rubber washer stops it cold. The permanent fix is swapping in a full-port brass ball valve during some future flush. It is a ten-minute upgrade on an empty tank and the dribble never comes back.
The 10-year-old-tank caveat
An honest warning before your first flush.
If a tank is past about ten years old and has never been flushed, think twice before starting now. A decade of sediment can harden into a mineral shelf that a hose flush will not move, and on a tank that age the sediment is sometimes intimate with the corrosion underneath it. Plumbers see old tanks develop leaks at the drain valve or the floor shortly after a first-ever flush, not because flushing broke them but because the flush disturbed the crust hiding how far gone the steel was. The honest play for an old, never-flushed, still-working heater: leave it, put a leak detector and a drain pan under it, and start the annual flush habit on its replacement from year one.
Tankless is a different job
Same mineral problem, different kit.
Tankless heaters have no tank floor for sediment to rest on, so nothing here drains. Instead, scale builds inside the narrow heat exchanger passages, and the maintenance is a descale: isolation valves closed, a small pump circulating descaling solution from a bucket through the unit for about an hour, then a rinse. The pump, hoses, and solution come as an actual boxed kit, linked in the gear box above, and the routine is annual in hard-water country. If your unit's service valves were never installed, that one-time plumber visit pays for itself in every DIY descale after.
Put the flush on the same fall weekend as the rest of the utility-room jobs on the seasonal home maintenance checklist, and the heater becomes one more thing that quietly works.
Flush questions
Necessity, frequency, and the leaky valve.
Is a water heater flush necessary?
On a tank heater, yes. Heating water drops dissolved minerals onto the tank floor, and the layer grows with every gallon. Sediment insulates the burner from the water, wastes fuel, causes the popping sounds, and corrodes the tank from the bottom. An annual flush is the single cheapest thing you can do to extend the heater's life.
What does a water heater flush actually do?
It drains the tank through the bottom valve so the outgoing water carries the loose sediment with it. Short refill bursts stir the floor and rinse out more. It does not descale the walls or fix an old anode rod; it removes the loose mineral layer before it hardens into one.
How long does it take to flush a water heater?
Plan on 45 minutes to an hour: a few minutes of setup, 20 to 40 minutes of draining, a couple of rinse cycles, and refill. Most of it is waiting. A tankless descale runs longer, usually about an hour of circulating descaler plus rinse time.
How often does a water heater need to be flushed?
Once a year is the baseline. Go every six months if you have hard water, a big household, or you hear popping start up between flushes. Homes on softened water can stretch toward 18 months, but annual keeps you on a schedule you will actually remember.
Why is my drain valve leaking after the flush?
A grain of sediment is usually stuck in the valve seat. Open the valve briefly under pressure to blast it clear, then close firmly. If it still weeps, thread a hose cap with a rubber washer onto the outlet as a stopgap and put a brass ball-valve replacement on the list for next year's flush.